深度强化学习之:PPO训练红白机1942

本篇是深度强化学习动手系列文章,自MyEncyclopedia公众号文章深度强化学习之:DQN训练超级玛丽闯关发布后收到不少关注和反馈,这一期,让我们实现目前主流深度强化学习算法PPO来打另一个红白机经典游戏1942。

相关文章链接如下:

强化学习开源环境集

视频论文解读:PPO算法

视频论文解读:组合优化的强化学习方法

解读TRPO论文,深度强化学习结合传统优化方法

解读深度强化学习基石论文:函数近似的策略梯度方法

NES 1942 环境安装

红白机游戏环境可以由OpenAI Retro来模拟,OpenAI Retro还在 Gym 集成了其他的经典游戏环境,包括Atari 2600,GBA,SNES等。

不过,受到版权原因,除了一些基本的rom,大部分游戏需要自行获取rom。

环境准备部分相关代码如下

1
pip install gym-retro
1
python -m retro.import /path/to/your/ROMs/directory/

OpenAI Gym 输入动作类型

在创建 retro 环境时,可以在retro.make中通过参数use_restricted_actions指定 action space,即按键的配置。

1
env = retro.make(game='1942-Nes', use_restricted_actions=retro.Actions.FILTERED)

可选参数如下,FILTERED,DISCRETE和MULTI_DISCRETE 都可以指定过滤的动作,过滤动作需要通过配置文件加载。

1
2
3
4
5
6
7
8
class Actions(Enum):
"""
Different settings for the action space of the environment
"""
ALL = 0 #: MultiBinary action space with no filtered actions
FILTERED = 1 #: MultiBinary action space with invalid or not allowed actions filtered out
DISCRETE = 2 #: Discrete action space for filtered actions
MULTI_DISCRETE = 3 #: MultiDiscete action space for filtered actions

DISCRETE和MULTI_DISCRETE 是 Gym 里的 Action概念,它们的基类都是gym.spaces.Space,可以通过 sample()方法采样,下面具体一一介绍。

  • Discrete:对应一维离散空间,例如,Discrete(n=4) 表示 [0, 3] 范围的整数。
1
2
3
from gym.spaces import Discrete
space = Discrete(4)
print(space.sample())

输出是

1
3
  • Box:对应多维连续空间,每一维的范围可以用 [low,high] 指定。 举例,Box(low=-1.0, high=2, shape=(3, 4,), dtype=np.float32) 表示 shape 是 [3, 4],每个范围在 [-1, 2] 的float32型 tensor。
1
2
3
4
from gym.spaces import Box
import numpy as np
space = Box(low=-1.0, high=2.0, shape=(3, 4), dtype=np.float32)
print(space.sample())

输出是

1
2
3
[[-0.7538084   0.96901214  0.38641307 -0.05045208]
[-0.85486996 1.3516271 0.3222616 1.2540635 ]
[-0.29908678 -0.8970335 1.4869047 0.7007356 ]]

  • MultiBinary: 0或1的多维离散空间。例如,MultiBinary([3,2]) 表示 shape 是3x2的0或1的tensor。
    1
    2
    3
    from gym.spaces import MultiBinary
    space = MultiBinary([3,2])
    print(space.sample())

输出是

1
2
3
[[1 0]
[1 1]
[0 0]]
  • MultiDiscrete:多维整型离散空间。例如,MultiDiscrete([5,2,2]) 表示三维Discrete空间,第一维范围在 [0-4],第二,三维范围在[0-1]。
1
2
3
from gym.spaces import MultiDiscrete
space = MultiDiscrete([5,2,2])
print(space.sample())

输出是

1
[2 1 0]
  • Tuple:组合成 tuple 复合空间。举例来说,可以将 Box,Discrete,Discrete组成tuple 空间:Tuple(spaces=(Box(low=-1.0, high=1.0, shape=(3,), dtype=np.float32), Discrete(n=3), Discrete(n=2)))
1
2
3
4
from gym.spaces import *
import numpy as np
space = Tuple(spaces=(Box(low=-1.0, high=1.0, shape=(3,), dtype=np.float32), Discrete(n=3), Discrete(n=2)))
print(space.sample())

输出是

1
2
(array([ 0.22640526,  0.75286865, -0.6309239 ], dtype=float32), 0, 1)

  • Dict:组合成有名字的复合空间。例如,Dict({'position':Discrete(2), 'velocity':Discrete(3)})
    1
    2
    3
    from gym.spaces import *
    space = Dict({'position':Discrete(2), 'velocity':Discrete(3)})
    print(space.sample())

输出是

1
OrderedDict([('position', 1), ('velocity', 1)])

NES 1942 动作空间配置

了解了 gym/retro 的动作空间,我们来看看1942的默认动作空间

1
2
env = retro.make(game='1942-Nes')
print("The size of action is: ", env.action_space.shape)

1
The size of action is:  (9,)

表示有9个 Discrete 动作,包括 start, select这些控制键。

从训练1942角度来说,我们希望指定最少的有效动作取得最好的成绩。根据经验,我们知道这个游戏最重要的键是4个方向加上 fire 键。限定游戏动作空间,官方的做法是在创建游戏环境时,指定预先生成的动作输入配置文件。但是这个方式相对麻烦,我们采用了直接指定按键的二进制表示来达到同样的目的,此时,需要设置 use_restricted_actions=retro.Actions.FILTERED。

下面的代码限制了6种按键,并随机play。

1
2
3
4
5
6
7
8
9
10
11
12
13
14
15
16
17
18
19
20
21
22
23
24
25
26
27
28
29
30
31
32
33
34
action_list = [
# No Operation
[0, 0, 0, 0, 0, 0, 0, 0, 0, 0, 0, 0],
# Left
[0, 0, 0, 0, 0, 0, 1, 0, 0, 0, 0, 0],
# Right
[0, 0, 0, 0, 0, 0, 0, 1, 0, 0, 0, 0],
# Down
[0, 0, 0, 0, 0, 1, 0, 0, 0, 0, 0, 0],
# Up
[0, 0, 0, 0, 1, 0, 0, 0, 0, 0, 0, 0],
# B
[1, 0, 0, 0, 0, 0, 0, 0, 0, 0, 0, 0],
]

def random_play(env, action_list, sleep_seconds=0.01):
env.viewer = None
state = env.reset()
score = 0
for j in range(10000):
env.render()
time.sleep(sleep_seconds)
action = np.random.randint(len(action_list))

next_state, reward, done, _ = env.step(action_list[action])
state = next_state
score += reward
if done:
print("Episode Score: ", score)
env.reset()
break

env = retro.make(game='1942-Nes', use_restricted_actions=retro.Actions.FILTERED)
random_play(env, action_list)

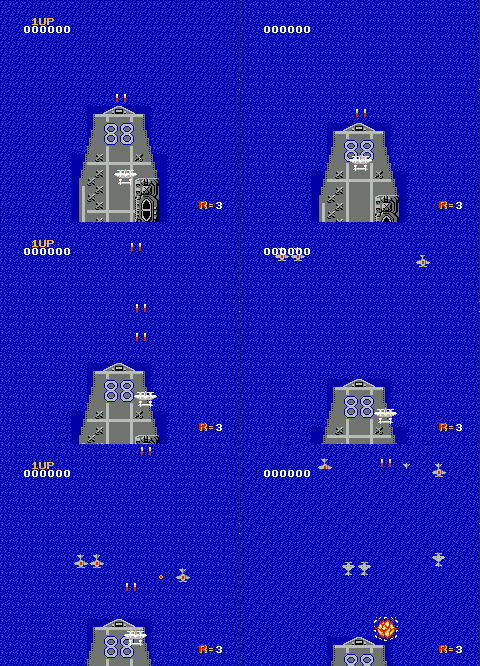
来看看其游戏效果,全随机死的还是比较快。

图像输入处理

一般对于通过屏幕像素作为输入的RL end-to-end训练来说,对图像做预处理很关键。因为原始图像较大,一方面我们希望能尽量压缩图像到比较小的tensor,另一方面又要保证关键信息不丢失,比如子弹的图像不能因为图片缩小而消失。另外的一个通用技巧是将多个连续的frame合并起来组成立体的frame,这样可以有效表示连贯动作。

下面的代码通过 pipeline 将游戏每帧原始图像从shape (224, 240, 3) 转换成 (4, 84, 84),也就是原始的 width=224,height=240,rgb=3转换成 width=84,height=240,stack_size=4的黑白图像。具体 pipeline为

  1. MaxAndSkipEnv:每两帧过滤一帧图像,减少数据量。

  2. FrameDownSample:down sample 图像到指定小分辨率 84x84,并从彩色降到黑白。

  3. FrameBuffer:合并连续的4帧,形成 (4, 84, 84) 的图像输入

1
2
3
4
5
6
7
def build_env():
env = retro.make(game='1942-Nes', use_restricted_actions=retro.Actions.FILTERED)
env = MaxAndSkipEnv(env, skip=2)
env = FrameDownSample(env, (1, -1, -1, 1))
env = FrameBuffer(env, 4)
env.seed(0)
return env

观察图像维度变换

1
2
3
4
5
env = retro.make(game='1942-Nes', use_restricted_actions=retro.Actions.FILTERED)
print("Initial shape: ", env.observation_space.shape)

env = build_env(env)
print("Processed shape: ", env.observation_space.shape)

确保shape 从 (224, 240, 3) 转换成 (4, 84, 84)

1
2
Initial shape:  (224, 240, 3)
Processed shape: (4, 84, 84)

FrameDownSample实现如下,我们使用了 cv2 类库来完成黑白化和图像缩放

1
2
3
4
5
6
7
8
9
10
11
12
13
14
15
16
17
18
19
20
21
22
23
24
class FrameDownSample(ObservationWrapper):
def __init__(self, env, exclude, width=84, height=84):
super(FrameDownSample, self).__init__(env)
self.exclude = exclude
self.observation_space = Box(low=0,
high=255,
shape=(width, height, 1),
dtype=np.uint8)
self._width = width
self._height = height

def observation(self, observation):
# convert image to gray scale
screen = cv2.cvtColor(observation, cv2.COLOR_RGB2GRAY)

# crop screen [up: down, left: right]
screen = screen[self.exclude[0]:self.exclude[2], self.exclude[3]:self.exclude[1]]

# to float, and normalized
screen = np.ascontiguousarray(screen, dtype=np.float32) / 255

# resize image
screen = cv2.resize(screen, (self._width, self._height), interpolation=cv2.INTER_AREA)
return screen

MaxAndSkipEnv,每两帧过滤一帧

1
2
3
4
5
6
7
8
9
10
11
12
13
14
15
16
17
18
19
20
21
22
23
class MaxAndSkipEnv(Wrapper):
def __init__(self, env=None, skip=4):
super(MaxAndSkipEnv, self).__init__(env)
self._obs_buffer = deque(maxlen=2)
self._skip = skip

def step(self, action):
total_reward = 0.0
done = None
for _ in range(self._skip):
obs, reward, done, info = self.env.step(action)
self._obs_buffer.append(obs)
total_reward += reward
if done:
break
max_frame = np.max(np.stack(self._obs_buffer), axis=0)
return max_frame, total_reward, done, info

def reset(self):
self._obs_buffer.clear()
obs = self.env.reset()
self._obs_buffer.append(obs)
return obs

FrameBuffer,将最近的4帧合并起来

1
2
3
4
5
6
7
8
9
10
11
12
13
14
15
16
class FrameBuffer(ObservationWrapper):
def __init__(self, env, num_steps, dtype=np.float32):
super(FrameBuffer, self).__init__(env)
obs_space = env.observation_space
self._dtype = dtype
self.observation_space = Box(low=0, high=255, shape=(num_steps, obs_space.shape[0], obs_space.shape[1]), dtype=self._dtype)

def reset(self):
frame = self.env.reset()
self.buffer = np.stack(arrays=[frame, frame, frame, frame])
return self.buffer

def observation(self, observation):
self.buffer[:-1] = self.buffer[1:]
self.buffer[-1] = observation
return self.buffer

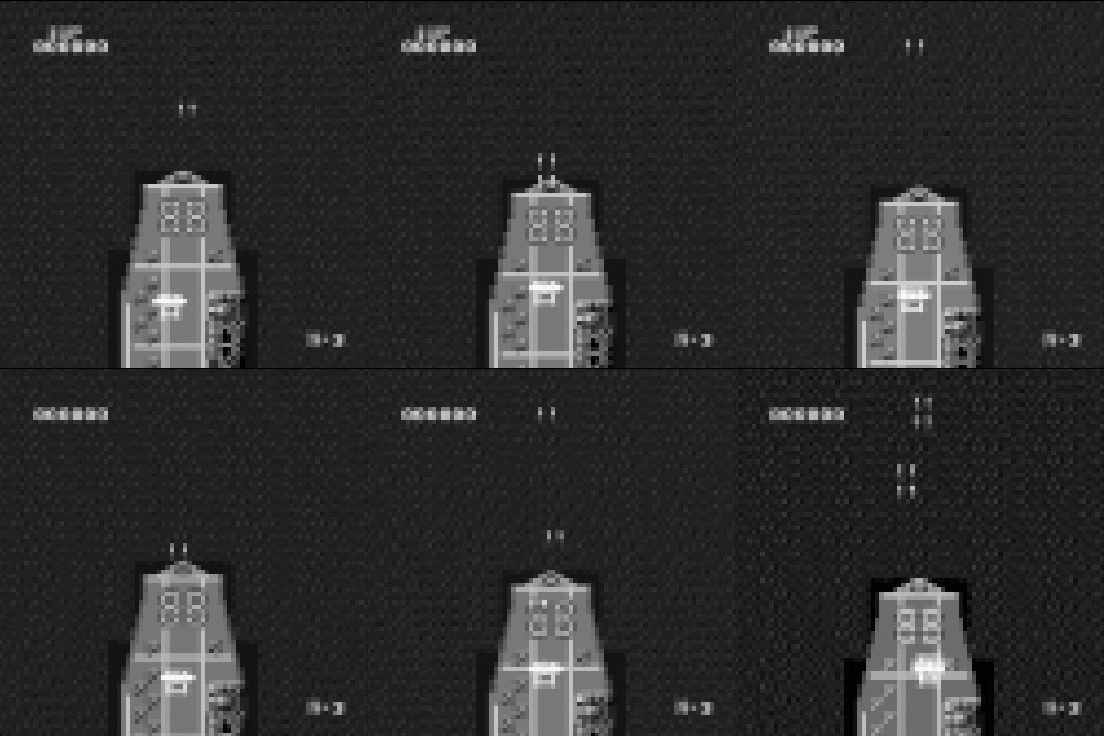
最后,visualize 处理后的图像,同样还是在随机play中,确保关键信息不丢失

1
2
3
4
5
6
7
8
9
10
11
12
13
14
15
16
17
18
19
20
21
def random_play_preprocessed(env, action_list, sleep_seconds=0.01):
import matplotlib.pyplot as plt

env.viewer = None
state = env.reset()
score = 0
for j in range(10000):
time.sleep(sleep_seconds)
action = np.random.randint(len(action_list))

plt.imshow(state[-1], cmap="gray")
plt.title('Pre Processed image')
plt.pause(sleep_seconds)

next_state, reward, done, _ = env.step(action_list[action])
state = next_state
score += reward
if done:
print("Episode Score: ", score)
env.reset()
break

matplotlib 动画输出

CNN Actor & Critic

Actor 和 Critic 模型相同,输入是 (4, 84, 84) 的图像,输出是 [0, 5] 的action index。

1
2
3
4
5
6
7
8
9
10
11
12
13
14
15
16
17
18
19
20
21
22
23
24
25
26
27
28
class Actor(nn.Module):
def __init__(self, input_shape, num_actions):
super(Actor, self).__init__()
self.input_shape = input_shape
self.num_actions = num_actions

self.features = nn.Sequential(
nn.Conv2d(input_shape[0], 32, kernel_size=8, stride=4),
nn.ReLU(),
nn.Conv2d(32, 64, kernel_size=4, stride=2),
nn.ReLU(),
nn.Conv2d(64, 64, kernel_size=3, stride=1),
nn.ReLU()
)

self.fc = nn.Sequential(
nn.Linear(self.feature_size(), 512),
nn.ReLU(),
nn.Linear(512, self.num_actions),
nn.Softmax(dim=1)
)

def forward(self, x):
x = self.features(x)
x = x.view(x.size(0), -1)
x = self.fc(x)
dist = Categorical(x)
return dist

PPO核心代码

先计算 \(r_t(\theta)\),这里采用了一个技巧,对 \(\pi_\theta\) 取 log,相减再取 exp,这样可以增强数值稳定性。

1
2
3
4
dist = self.actor_net(state)
new_log_probs = dist.log_prob(action)
ratio = (new_log_probs - old_log_probs).exp()
surr1 = ratio * advantage

surr1 对应PPO论文中的 \(L^{CPI}\)

然后计算 surr2,对应 \(L^{CLIP}\) 中的 clip 部分,clip可以由 torch.clamp 函数实现。\(L^{CLIP}\) 则对应 actor_loss。

1
2
surr2 = torch.clamp(ratio, 1.0 - self.clip_param, 1.0 + self.clip_param) * advantage
actor_loss = - torch.min(surr1, surr2).mean()

最后,计算总的 loss \(L_t^{CLIP+VF+S}\),包括 actor_loss,critic_loss 和 policy的 entropy。

1
2
3
4
entropy = dist.entropy().mean()

critic_loss = (return_ - value).pow(2).mean()
loss = actor_loss + 0.5 * critic_loss - 0.001 * entropy

上述完整代码如下

1
2
3
4
5
6
7
8
9
10
11
12
13
14
15
16
17
18
19
20
21
22
23
for _ in range(self.ppo_epoch):
for state, action, old_log_probs, return_, advantage in sample_batch():
dist = self.actor_net(state)
value = self.critic_net(state)

entropy = dist.entropy().mean()
new_log_probs = dist.log_prob(action)

ratio = (new_log_probs - old_log_probs).exp()
surr1 = ratio * advantage
surr2 = torch.clamp(ratio, 1.0 - self.clip_param, 1.0 + self.clip_param) * advantage

actor_loss = - torch.min(surr1, surr2).mean()
critic_loss = (return_ - value).pow(2).mean()

loss = actor_loss + 0.5 * critic_loss - 0.001 * entropy

# Minimize the loss
self.actor_optimizer.zero_grad()
self.critic_optimizer.zero_grad()
loss.backward()
self.actor_optimizer.step()
self.critic_optimizer.step()

补充一下 GAE 的计算,advantage 根据公式

可以转换成如下代码

1
2
3
4
5
6
7
8
9
def compute_gae(self, next_value):
gae = 0
returns = []
values = self.values + [next_value]
for step in reversed(range(len(self.rewards))):
delta = self.rewards[step] + self.gamma * values[step + 1] * self.masks[step] - values[step]
gae = delta + self.gamma * self.tau * self.masks[step] * gae
returns.insert(0, gae + values[step])
return returns

外层 Training 代码

外层调用代码基于随机 play 的逻辑,agent.act()封装了采样和 forward prop,agent.step() 则封装了 backprop 和参数学习迭代的逻辑。

1
2
3
4
5
6
7
8
9
10
11
12
13
14
15
16
for i_episode in range(start_epoch + 1, n_episodes + 1):
state = env.reset()
score = 0
timestamp = 0

while timestamp < 10000:
action, log_prob, value = agent.act(state)
next_state, reward, done, info = env.step(action_list[action])
score += reward
timestamp += 1

agent.step(state, action, value, log_prob, reward, done, next_state)
if done:
break
else:
state = next_state

训练结果

让我们来看看学习的效果吧,注意我们的飞机学到了一些关键的技巧,躲避子弹;飞到角落尽快击毙敌机;一定程度预测敌机出现的位置并预先走到位置。

深入 LeetCode 470 拒绝采样,状态转移图求期望和一道经典统计求期望题目 深入形象地理解极大似然估计(MLE) 1: 引入问题

Author and License Contact MyEncyclopedia to Authorize
myencyclopedia.top link https://blog.myencyclopedia.top/zh/2021/rl-ppo-1984/
github.io link https://myencyclopedia.github.io/zh/2021/rl-ppo-1984/

You need to set install_url to use ShareThis. Please set it in _config.yml.

评论

You forgot to set the shortname for Disqus. Please set it in _config.yml.
Your browser is out-of-date!

Update your browser to view this website correctly. Update my browser now

×